Coco pralines!

We have both worked in animal rehabilitation centers in South America and lived there for a couple of years, and in South America they L.O.V.E. dulce de leche, which is basically caramelized milk. The easy way to veganize it is to make dulce de cocoleche.

You’ll need a bit less than half as much sugar as coconut milk, so if you use two cans of milk, use a bit less of a can of unrefined brown sugar. Bring the sugar and coconutmilk to a boil and let it simmer for as long as it takes to make a thick, gooey caramel sauce….

Easy as that!

But once you’ve done that, you have to make dulce de cocoleche pralines, trust us… You have to!

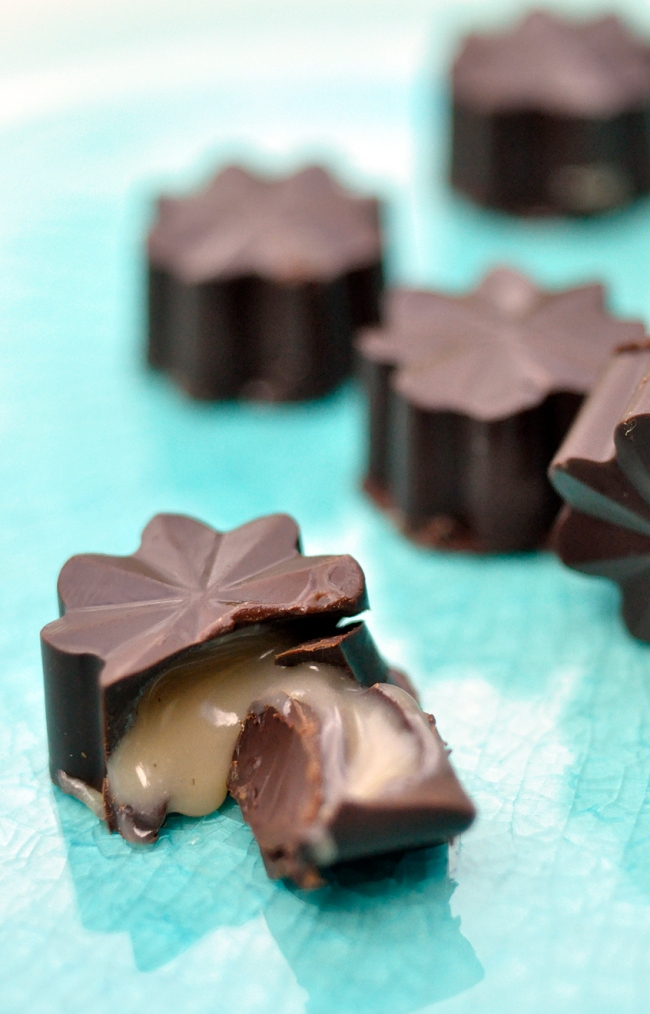
Basically you just melt your favorite rich, dark chocolate put it in praline molds, so that it covers the whole mold but leaves a generous space in the center for caramel. Put the mold in the freezer for a few minutes, remove, fill the centers with caramel, back in the freezer for about 15 minuttes or until the surface of the caramel is hard enough to cover with another layer of chocolate… Viola! Pralines you won’t want to share 🙂

Image

Image

Cashew Brie….YUM!

As I, Line mentioned in an earlier post, we have been experimenting with making Miyoko Shinner‘s artisan vegan cheeses (from her awesome cookbook http://www.amazon.com/Artisan-Vegan-Cheese-Miyoko-Schinner/dp/1570672830/ref=sr_1_1?ie=UTF8&qid=1354818488&sr=8-1&keywords=artisan+vegan+cheese)

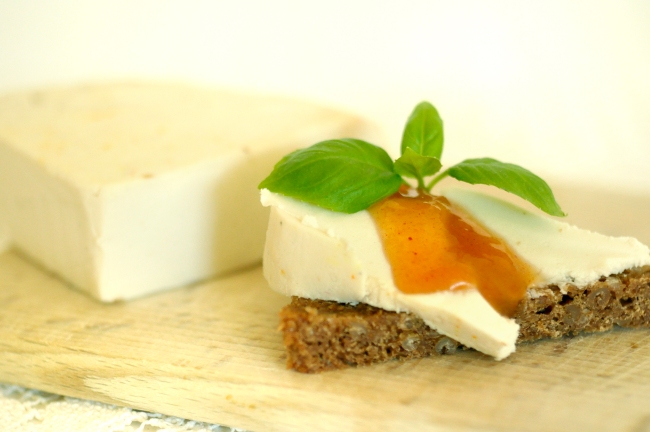
What I have been working on, and finished quite a while ago is the brie. It is really, really good…. If I can do it you can too, it’s not that hard 🙂

Image

Vegan brie

Prep: 9 minutes
Soak: 3 hours
Cook: 7 minutes
Rest: 2 days, 16 hours
Servings: about 16, one 6-inch round

Ingredients:
1 cup raw cashews, soaked in water for 3 hours, drained
1 cup water
½ cup plain unsweetened soy yogurt
½ cup refined coconut oil
1 teaspoon nutritional yeast
1 ¼ teaspoons sea salt
2 tablespoons tapioca flour or starch
1 teaspoon agar agar powder or flakes

1. Combine cashews, water, yogurt, coconut oil, nutritional yeast and 1 teaspoon salt in a blender; process until smooth. Transfer mixture into a large bowl, cover with a towel. Let sit at room temperature, 24-36 hours.

2. Pour mixture into a medium saucepan. Whisk in tapioca flour and agar; heat over medium heat, stirring frequently. Cook until mixture is thick and pulls away from the side of the pan, about 5 minutes.

3. Line a 6-inch cake pan with cheesecloth; pour in hot cheese mixture. Spread mixture evenly; cover with cheesecloth. Let cool in refrigerator until firm, 4 hours. The inside will still be very soft.

4. Remove cheesecloth. Wet hands; sprinkle them with remaining 1/4 teaspoon salt. Rub wet salt over cheese. Place cheese on a wire rack; let sit in a cool corner, 24 hours. Flip cheese over; let rest until it appears dry, 12 hours. Wrap in wax paper; store in refrigerator up to 2 weeks. For longer storage, freeze in a sealed plastic bag.

I have made to rounds, and in the second batch I substituted the water for some rejuvilac (it’s an important ingredient in many of Miyoko’s cheese recipes, you’ll learn alot more about it once you buy the book… Go on! You know you want it)

It takes a few days, but believe me, it’s worth it. It’s so creamy and feels as unhealthy as real brie, except it pretty surely isn’t… A good day to be vegan 🙂

I feel like such a newbie…

Hi, Line here..

Know how sometimes you just make something really perfect, and because you didn’t expect it to be you didn’t write anything down…? I made a cheesecake a couple weeks ago, and it was AMAZING, only I’ m not sure how I did it. It was cashew based, and tasted wonderful, so I’m going to share the picture anyway, and hopefully I’ll get it right again and write everything down 🙂

Image

Beat this beet carpaccio…

As with my previous post, this simple and pretty dish was made for some friends at had over for a little pre easter lunch yesterday.

Beetroot carpaccio:

3 beetroots

3 tblsp of apple cider vinegar

1 tsp salt

a bit of vegan parmesan ( I used this recipe http://janeshealthykitchen.com/paleo-vegan-parmesan-cheese/, but couldn’t get the vitamin c crystals so added a tsp of miso instead… It is truly an amazing invention and you need to try and make this 🙂

Vegan mayo ( I make my own, it’s really simple, recipe will follow soon. Untill then store bought is fine or you can leave it out)

a bit of wasabi.

Peel and thinly slice the beets, a grater that does slices is a big help here. Mix the salt and vinegar in a bowl and put the beets in that mix, mak sure you mix it so that all the beets get a bit of vinegar and salt on them. Put that aside for about 15 minutes, it helps soften the raw beets just a bit.

Mix the mayo and wasabi, the wasabi can be a bit hard to incorporate, so you might want to dissolve it in a bit of lemon juice before adding it to the mayo.

Now rinse the beets in water, drain them and put them on a plate. Drizzle with a bit of good oil (your choice of olive, canola or any other favorite of yours), sprinkle with salt, pepper and parmesan. Put some wasabi mayo on top and you’re done. I pimped my carpaccio with some garlic sprouts and basil:

BeetCarpaccio

BeetCarpaccio1

Keeping it simple.

Yesterday I, Line had some friends over for lunch, and I wanted to keep it simple and kind of colourfull like springtime, which STILL hasn’t hit Denmark….

Quinoa salad.

100 g of quinoa, boiled as instructed on the box/bag.

a bunch of your favorite veggies, (I used what I had, about ten asparagus, 2 red peppers, 2 carrots and 10 spring onions)

1 finely chopped red onion

a handfull of olives.

dressing:

juice from a lemon

olive oil

agave syrup

salt, peper and garlic

After boiling the qunioa, mix the dressing and pour it over the grains while they are still warm, that way it sort of gets into the quinoa. Mix in the chopped red onion. Slice the veggies that need slicing and grill the on a grill pan, to get those charred black lines. When all have been grilled cut them into the size you prefer and mix them with the quinoa and dressing. Finaly throw in the olives and you’re done…. It was really good, simple and colourful, see:

Image

Image

Vegan Cottage cheese

Well, we have been very quiet for about a year now, but I think we are back on track, now living in a big ol’ farm house way out in the countryside, the two of us with five very good friends…. loving it.

Living among fields and (very industrialized) farmers is inspirational, mostly because it makes you think “this can be done better, friendlier, healthier and dare we say way tastier…”

We have been getting in to cheesemaking, after purchasing Artisan Vegan Cheese by Miyko Schinner, great book. We are making rejuvelac and airdrying brie, as we write 🙂

But this post is not about Artisan Vegan Cheese this is just the simplest recipe for a nice vegan cottage cheese we think is as good as we remember the cows milk based stuff to be.

Ingredients:

500g of tofu

1/2 dl of soy youghurt, unsweetened and natural

1/2 dl of soy cream, the savory kind

lemon juice

salt and pepper.

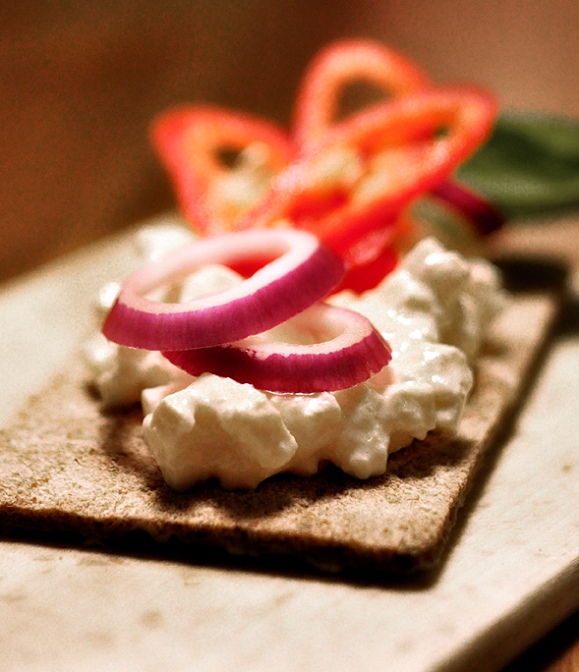
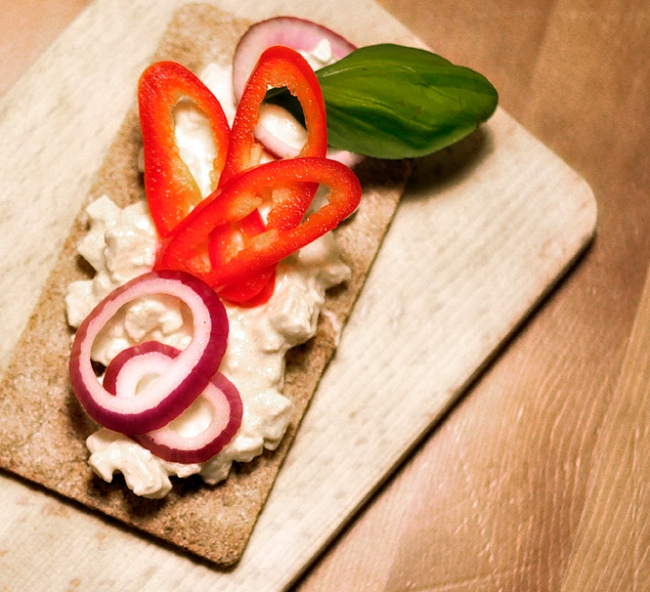
In a bowl you mix the cream and yoghurt with as much salt, pepper and lemon juice as you think it needs to taste awesome. Crumble in the tofu or dice it into tiny little cubes and add that to the bowl, with a spoon mix the two things and viola! you have this:ImageImage

Ravioli with creamy sauce

Well, we posted a fried ravioli recipe earlier, we invented those lovely fried things because we still hadn’t figured out a way to make the “normal” boiled ravioli, well here it is! 🙂

What you’ll need instead of the spring roll pastry is some won ton sheets (you’ll get loads of different shapes and sizes at you local asian food shop), be careful, alot of won ton sheets have eggs, but as it turns out alot don’t, GRRREAT! We stick with the same filling as the fried ravioli, but add a bit of silken tofu because that comes out alot like ricotta cheese, yum!

20 sheets of won ton pastry

500 g frozen whole spinach leaves (defrozen and completely drained)
1 dl soy cream (the savory kind of course) + 100g of silken tofu (adds a ricotta feel to the filling, but can be left out)
1 chopped onion
2 cloths of chopped garlic
1/2 tsp nutmeg
salt, peber and oil for frying

Fry the garlic and onion slowly, leaving it to get soft and “transparent” , without getting colour.

Add the nutmeg and spinach, fry for a couple of minutes, add the crumbled silken tofu and the cream to make a thick creamy filling for the ravioli.

taste and season with salt, peper, chili if you like it spicy, but keep it sort of mellow in the flavour, it suits the dish better.

Now what you do is, you place the 20 wonton pieces in two rows, scooping up a spoonful of filling onto each of the “bottom pieces” (see pictures). Then with your fingers put wtaer on “the lids” and squeeze the two gently togther, using a fork to press the sides together (actually theiy stick fairly well together so you dont need the fork bit, but it does make the ravioli look extra homemade). Then bring a large pot of ligthly salted water to the boil and boil the ravioli 5 at a time (unless you hame a REALLY big pot) for about 2 minuttes.

We made this dish with Line’s brother Magnus, he’s a vegetarian, but loves experimenting and eating vegan food (no worries, he’ll be vegan before he knows what hit him 😉 He did the sauce and gave us this rather loose description of what he did:

Fry some very finely chopped onions and garlic.

Add 0,5 dl of white whine and let it simmer for a couple of minuttes

add soy creamer (or oat, almond or any which creamer you prefer) and some nutritional yeast flakes to give it that cheesy flavour.

then salt, pepper, lemon a bit of nutmeg and you´re good to go.

You can let it simmer to reduce it a bit and make the sauce thicker.

Serve with fresh basil (or water cress as we did since we were all out of basil), freshly ground black pepper and for those who love it, a drizzle of good olive oil.

Done!

Danish vegan “smørrebrød”

Well, we admit this might not be that interesting to non- danes, but it is really traditional to have smørrebrød in Denmark, and vegan style quite tasty too 🙂

Usually smørrebrød is a lunch thing, it’s cold and eaten with a beer and a “snaps”, a traditional Danish brandy served ice cold and in Line’s oppinion tastes quite nasty 😉

We’ve added a picture of plenty of different smørrebrød here, and we’ll post the recipes continuosly… How come there’s never enough time in a day to do everything you want? 🙂

What you’ll need:

Two slices of rye bread pr. person (it’s rugbrød in Danish and it’s all about getting it as dark and full of seeds as you can)

Vegan margarine

Salad and dill, parsley, cress, whatever you can think off to pimp up your smørrebrød

For “fish” filets:

half a can of Nutolene (I’m not sure if you can actually get this outside DK, but it’s pressed peanuts, which you can slice, has a very nice, but weak flavor, you can use tofu instead.)

plain flour and breadcrumbs for breading

quite a lot of oil for frying

plenty og vegan “remoulade” (another Danish hit, but I basically make it using finely chopped pickles, mustard, sugar and soycream – in DK you can buy it readymade, vegan aswell)

Dill and lemon slices

caviart (the vegan caviarstyle product you see here: http://www.cavi-art.com/ – in DK you can get it in Føtex)

Slice up the Nutolene about 0,5 cm thick, slice it the long way, so you don’t end up with round “fish”. Then slice each slice diagonally to get triangular shaped slices.In a wide bowl mix half a cup of flour with about 4 tblsp of water to make a thick, sticky batter. Put the breadcrumbs in a plate. Heat the oil in a pan, let the whole pan be greasy. Take each “fish” filet, turn it first in the sticky batter, then in the breadcrumbs and fry it untill it is golden brown and crispy.

Then butter a couple of ryebread slices with the margerine, put a salad leaf on each and serve the “fish” filets on top, with remoulade, dill, caviart and a lemonslice… Check out the picture 🙂

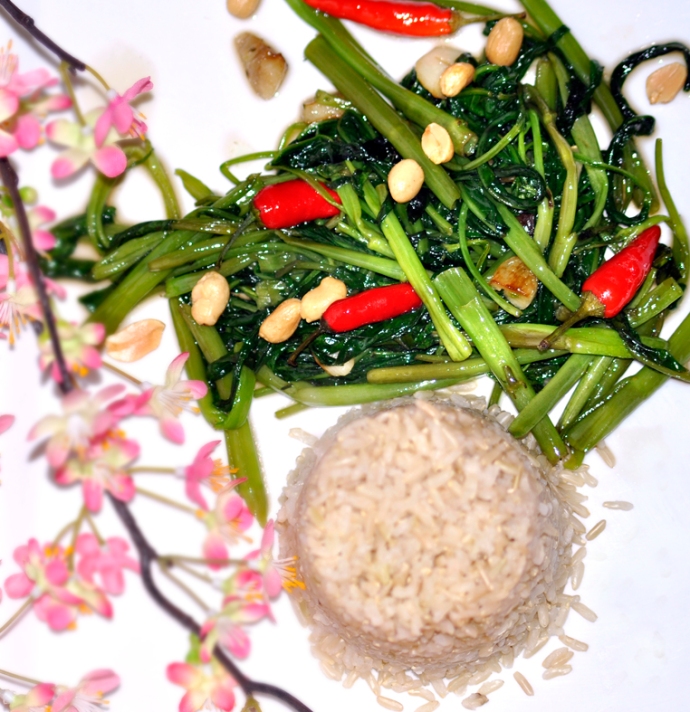
Morning Glory

Another Thai inspired dish, that you’ll get in Vietnam, Laos and Cambodia aswell with little local twists 🙂

About 20 stalks of morning glory (it’s a type of asian water spinach, I believe)

3 cloves of garlic

8 not so hot but red chilies

5 tbls of the mushroom/seaweed “fishsauce” described in the Papaya salad recipe

1/2 tsp of sugar

1/4 cup of water

about 4 tbls of oil for frying (it sounds like a lot but this need sto be a bit greasy to be good 😉

This is REALLY easy. Rinse and rip the leaves of the morning glory stalks and break the stalks into 5 cm pieces. Cut each clove of garlic into 3-4 piece. Make sure the oil and pan and VERY hot, almost smoking, then add the garlic and let it fry for about. Add the morning glory and chili and fry for another minute, but not longer, or it will get kind of bittter. Finally ad the “fishsauce”, sugar and water and stir the whole thing for 30 sec.

Serve with rice and peanuts..

Papaya Salad (thai style)

This weekend we were taking a trip down memory lane, to when we travelled South East Asia last year.You can get loads of vegetarian/vegan food there, but my God do they love their fish sauce?

We tried making our own fish sauce, it was a quick attempt that will probably need some further ajustment.

Papaya salad tastes great, it has this bitter-sweet-salty-spicy combo that will surprise your tastebuds 🙂


Here’s what we did:

1 big green papaya (meaning hard and unripe, you’ll find them in most asian supermarkets)

a handfull of green beans (we used peas, as you can see on the photo, but beans is the right thing for this)

2 carrots

Juice of 4-5 limes

1 thai (very spicy) chili

8 cloves of garlic

12 cherry tomatoes cut in half

6 tbls mushroom soy sauce (regular will do aswell)

1 sheet of nori seaweed (other types will surely work aswell)

3 tbls of sugar melted in a tsp of water to make a syrup

1 handfull of chopped salted peanuts or cashews


First you make the “fishsauce” by heating up the mushroom soy, when it boils remove it from the heat and crumble the seaweed into it. Leave that for a while. If you have a julienne grater use that otherwise just you regular grater and finely grate the papaya and carrot. Smash your garlic cloves and put them in a bowl with the beans and chili, using either a morter or the end of a wine bottle pound a bit on the beans, chili and garlic to make them ready to absorb the flavour, but don’t overdo it. Then add the grated papaya and carrots giving them another light beating 😉 Then add the limejuice, sugerwater and pour the “fishsauce” through a filter (to get rid of the seaweed bits) into the bowl, add the cherry tomatoes and stir the whole thing so that everything gets a bit of the lime, “fishsauce” and sugarwater.

Serve with some peanuts and lime 🙂